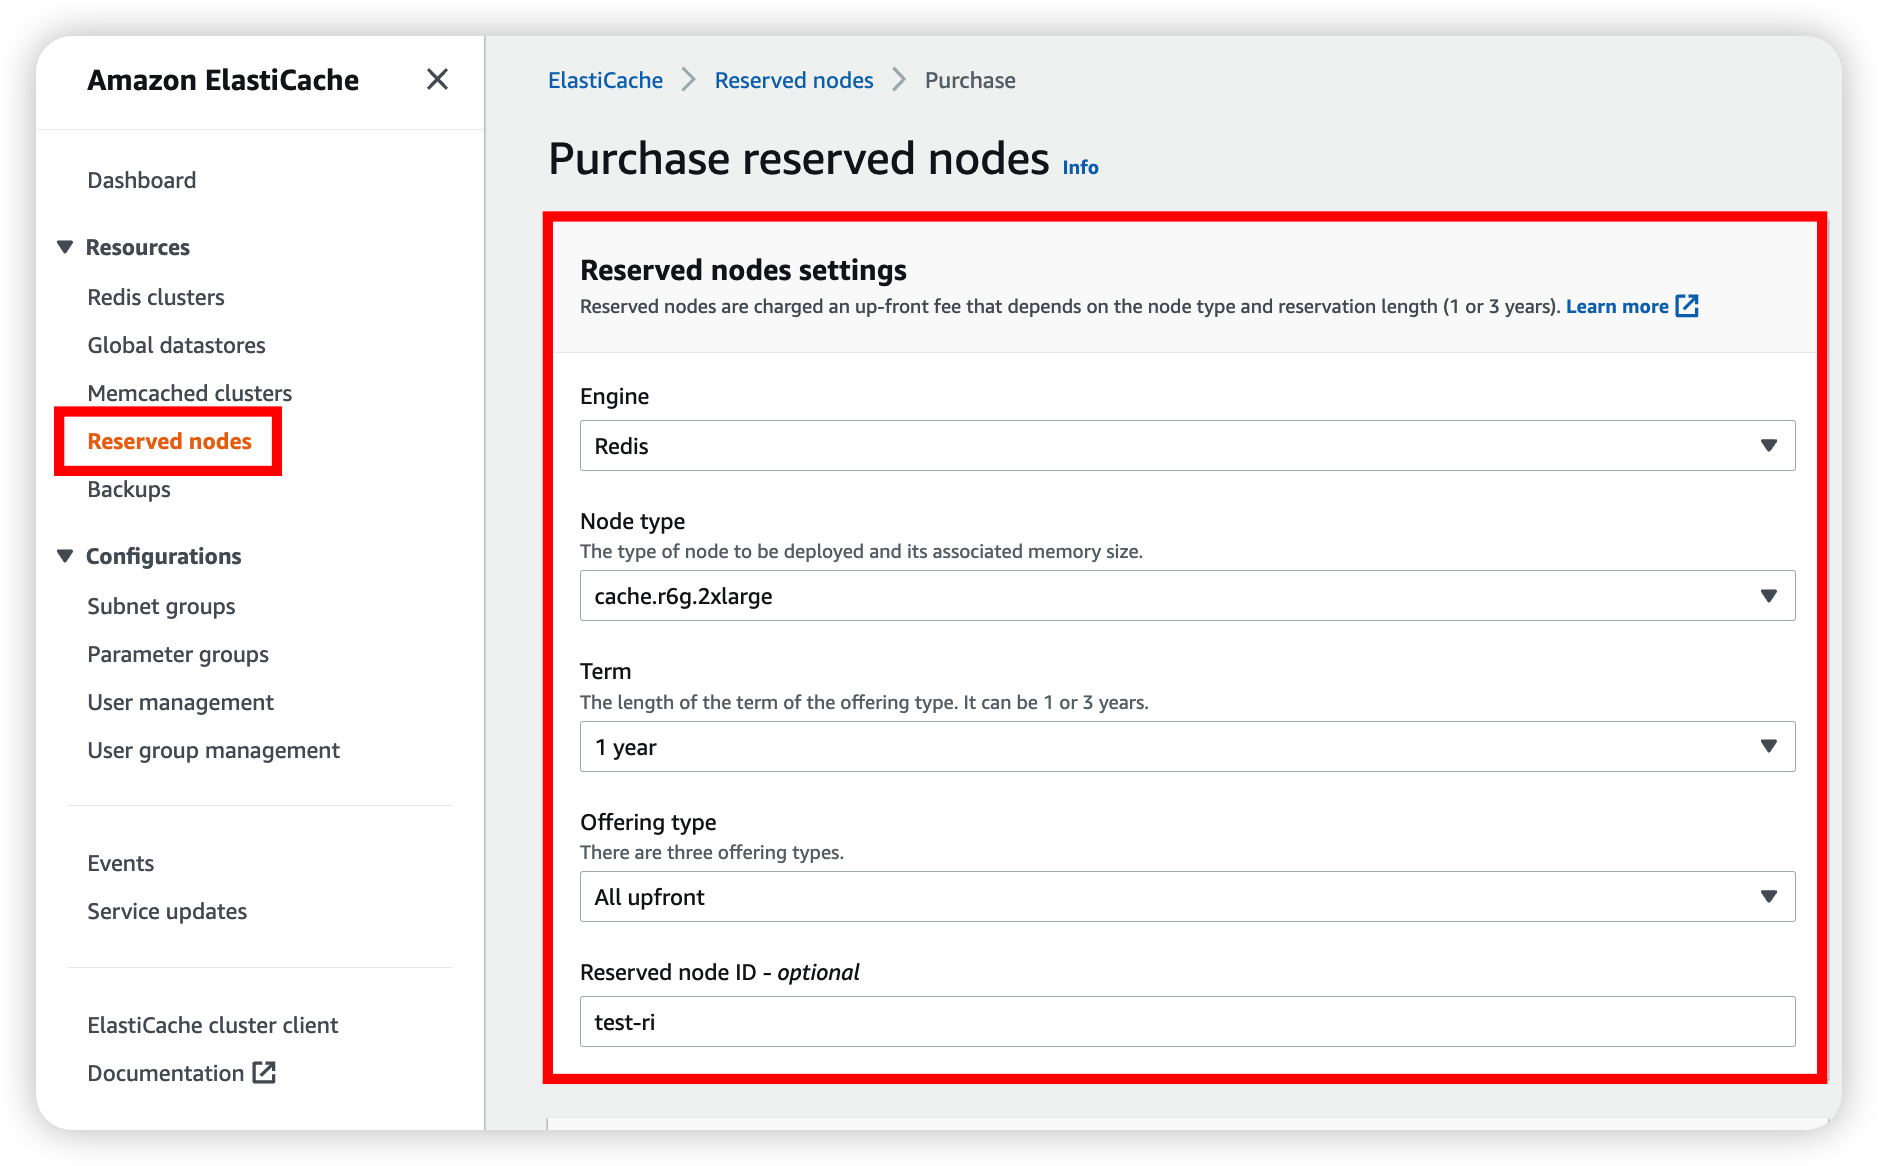
AWS Console에서 ElastiCache RI 구입 시엔 아래와 같이 Engine, Node type, Term, Offering Type만 지정해주면 된다
(node ID : 그냥 이름 정할거면 정하라는 것)
그러나 CLI나 SDK로 다량구매를 하고싶어 찾아보니,,,,
https://docs.aws.amazon.com/ko_kr/AmazonElastiCache/latest/red-ug/reserved-nodes-purchasing.html
예약 노드 구입 - Amazon ElastiCache for Redis
예, 구매를 선택하면 선택한 예약 노드에 요금이 부과됩니다. 요금이 부과되지 않도록 하려면 [Cancel]을 선택합니다.
docs.aws.amazon.com
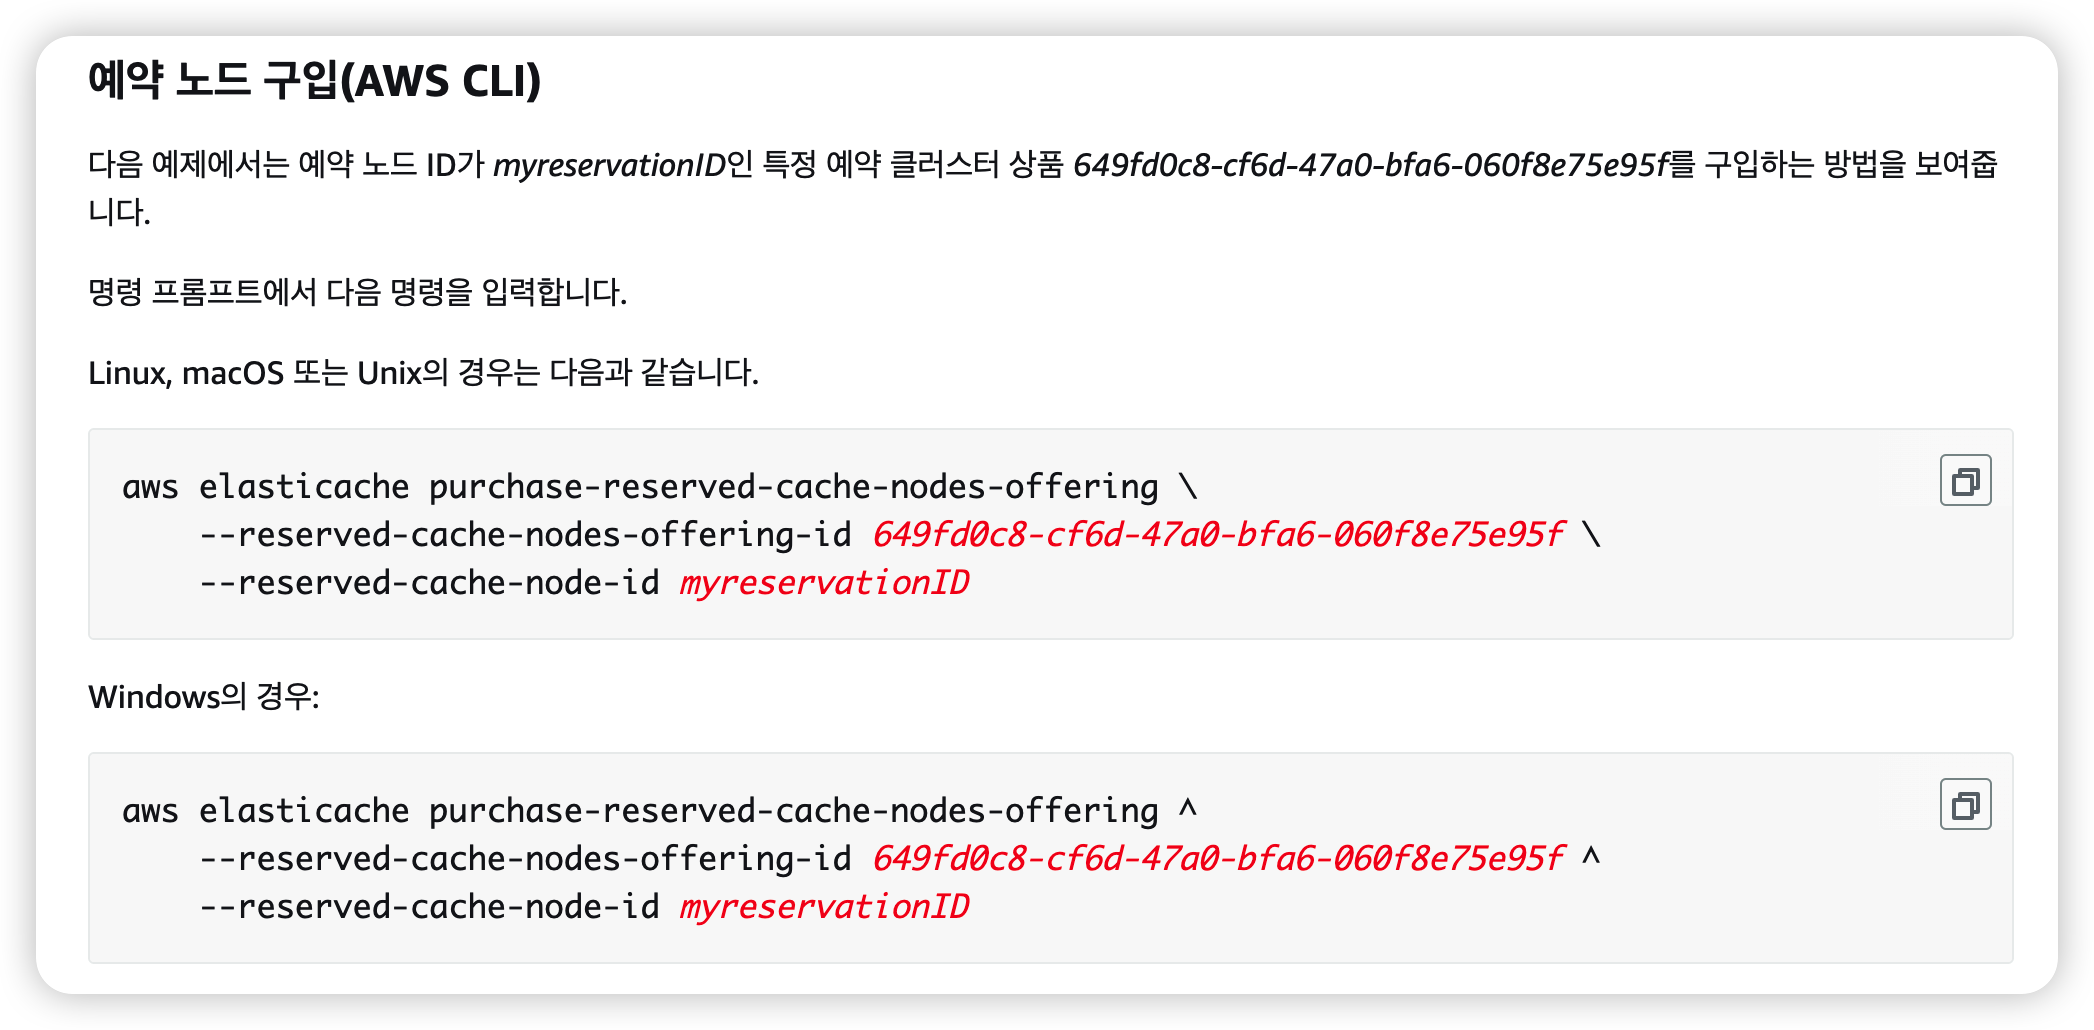
engine이나 node type 등등은 없어지고, 웬 offering id가 필수로 필요하댄다


도대체 offering id가 뭐냐? 하고 찾아보니...
Console상에서 engine, node type, 등등을 고를 시 offering id가 자동으로 매핑되어 구매되는 형식이었다
그러니까 결국 engine, node type, term, offering type 정보 취합 시 하나의 offering id와 매핑되는 것이다
그럼 offering id를 어디서 찾느냐? 공개된 리스트가 있나? 하고 찾아봤는데 그것도 없다
-> describe-reserved-cache-nodes-offerings 라는 별도의 명령을 통해 offering id를 찾을 수 있다....
Engine / Node Type / Term / Offering Type / Count(갯수) 정보가 적힌 csv를 통해 바로 RI를 구입하는 스크립트는 아래와 같다
1. describe offering id
1) purchase.csv
redis,cache.m4.xlarge,1,Heavy Utilization,1
memcached,cache.m5.large,1,All Upfront,5
redis,cache.r5.4xlarge,1,All Upfront,4
redis,cache.t2.small,1,Heavy Utilization,1
redis,cache.t3.small,3,All Upfront,7
참고로 t2, m4, r4 instance들은 Heavy Utilization밖에 안된다
2) purchase.py
import boto3
import csv

session = boto3.Session(profile_name='PROFILE_NAME')
client = session.client('elasticache')

with open('purchase.csv', mode='r') as cache:
    reader = csv.reader(cache)
    for rows in reader:
        response = client.describe_reserved_cache_nodes_offerings(
            CacheNodeType=rows[1],
            Duration=rows[2],
            ProductDescription=rows[0],
            OfferingType=rows[3],
        )

        print(response['ReservedCacheNodesOfferings'][0]['ReservedCacheNodesOfferingId'] + ', ' + rows[4])
이렇게 두고 purchase.py 를 실행시키면 아래와 같이 출력된다

offering id가 잘 출력되는걸 확인했으니, 구입까지 쭉 해보자
2. purchase ElastiCache RI
1) purchase.csv
redis,cache.m4.xlarge,1,Heavy Utilization,1
memcached,cache.m5.large,1,All Upfront,5
redis,cache.r5.4xlarge,1,All Upfront,4
redis,cache.t2.small,1,Heavy Utilization,1
redis,cache.t3.small,3,All Upfront,7
2) purchase.py
import boto3
import csv

session = boto3.Session(profile_name='PROFILE_NAME')
client = session.client('elasticache')

with open('purchase.csv', mode='r') as cache:
    reader = csv.reader(cache)
    for rows in reader:
        response = client.describe_reserved_cache_nodes_offerings(
            CacheNodeType=rows[1],
            Duration=rows[2],
            ProductDescription=rows[0],
            OfferingType=rows[3],
        )

        # print(response['ReservedCacheNodesOfferings'][0]['ReservedCacheNodesOfferingId'] + ', ' + rows[4])
        offering_id = response['ReservedCacheNodesOfferings'][0]['ReservedCacheNodesOfferingId']

        purchase = client.purchase_reserved_cache_nodes_offering(
            ReservedCacheNodesOfferingId=offering_id,
            CacheNodeCount=int(rows[4])
        )

        print(purchase['ReservedCacheNode']['ReservationARN'])
마지막 ARN 출력은 필요한 사람만,,
돈이 나가는 작업이니 그래도 신중하게 하자
끝
'공부 > AWS' 카테고리의 다른 글
| [MSK Connector] Bigquery용 Connector 구성 (2) | 2023.05.09 |
|---|---|
| [AWS] Session Manager 중앙 집중식 로깅 구현 : SSM Session Manager Cross Account S3 Logging (0) | 2022.08.28 |
| [AWS 리소스 초기화] aws-nuke in MAC (0) | 2022.05.19 |
| [AWS S3] API Call로 S3 Access Logging 설정 시 유의할 점 (boto3) (0) | 2022.02.23 |
| [AWS] Private하게 DataSync 사용하기 (2) | 2021.12.11 |





댓글