Reference
- https://aws.amazon.com/ko/blogs/desktop-and-application-streaming/integrating-freeradius-mfa-with-amazon-workspaces/
- https://cloudest.tistory.com/52
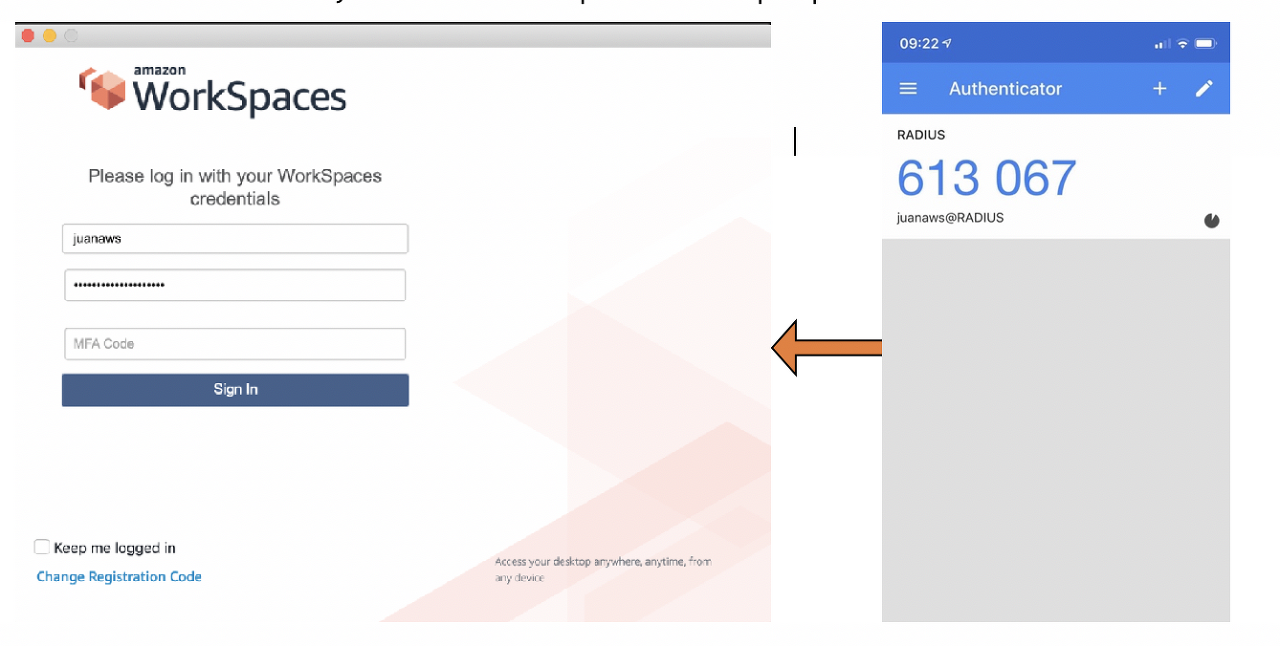
목표
Prerequisites
- Directory Service의 Directory 하나와 그 안의 WorkSpace (이전 글에서 만든 honglab.com Directory 사용)
- Directory가 있는 VPC와 통신이 되는 Amazon Linux Server
- Linux Server <-> Directory 간 UDP 1812 Port 보안그룹 Open
(Directory의 보안그룹은 outbound가 다 안열려있기 때문에 같은 Port로 outbound까지 열어줘야 한다) - MFA Client App (Google Authenticator 이나 Chrome 인증 도구 등)
시작!
※ Amazon Linux 2에서 진행
1. RADIUS Server 설정
# root로 진행 (또는 sudo -i)

# Update 및 저장소 활성화
yum -y update
amazon-linux-extras install epel -y
yum -y localinstall http://linotp.org/rpm/el7/linotp/x86_64/Packages/LinOTP_repos-1.1-1.el7.x86_64.rpm

# MariaDB 설치 및 활성화
yum install -y mariadb-server
systemctl enable mariadb
systemctl start mariadb

# LinOTP 설치 및 MariaDB 연동
yum install -y LinOTP LinOTP_mariadb
restorecon -Rv /etc/linotp2/
restorecon -Rv /var/log/linotp

# LinOTP, MariaDB credentials 구성
linotp-create-mariadb
# Set root password? 나오면 Y 하고 비번세팅(2번), 나머진 다 Enter치다가 마지막에 비번 쳐줌

# python-repoze-who 버전 잠금 (뭔지 모름)
yum install -y yum-plugin-versionlock
yum versionlock -y python-repoze-who

# Apache 설치 및 vhost config
yum install -y LinOTP_apache
systemctl enable httpd
systemctl start httpd
mv /etc/httpd/conf.d/ssl.conf /etc/httpd/conf.d/ssl.conf.back
mv /etc/httpd/conf.d/ssl_linotp.conf.template /etc/httpd/conf.d/ssl_linotp.conf

# LinOTP 관리 포털 암호 설정
htdigest /etc/linotp2/admins "LinOTP2 admin area" admin
# 재부팅
reboot
2. LinOTP 구성 (AD와 통합)
https://[RADIUS 서버 IP]/manage 로 웹에서 접속 (RADIUS 서버 보안그룹에서 443 열어둬야 함)
에러 창이 뜨는 것 같지만 그냥 고급 > 안전하지 않음으로 이동 을 눌러주자
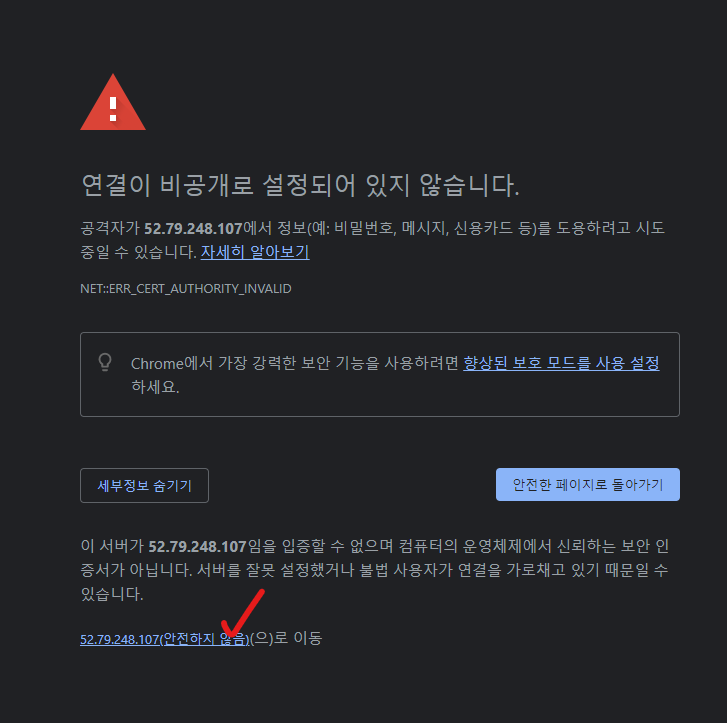
그러면 이렇게 로그인 하라는 팝업창이 뜬다

admin과 htdigest 명령으로 설정했던 비밀번호를 입력하고 로그인하자
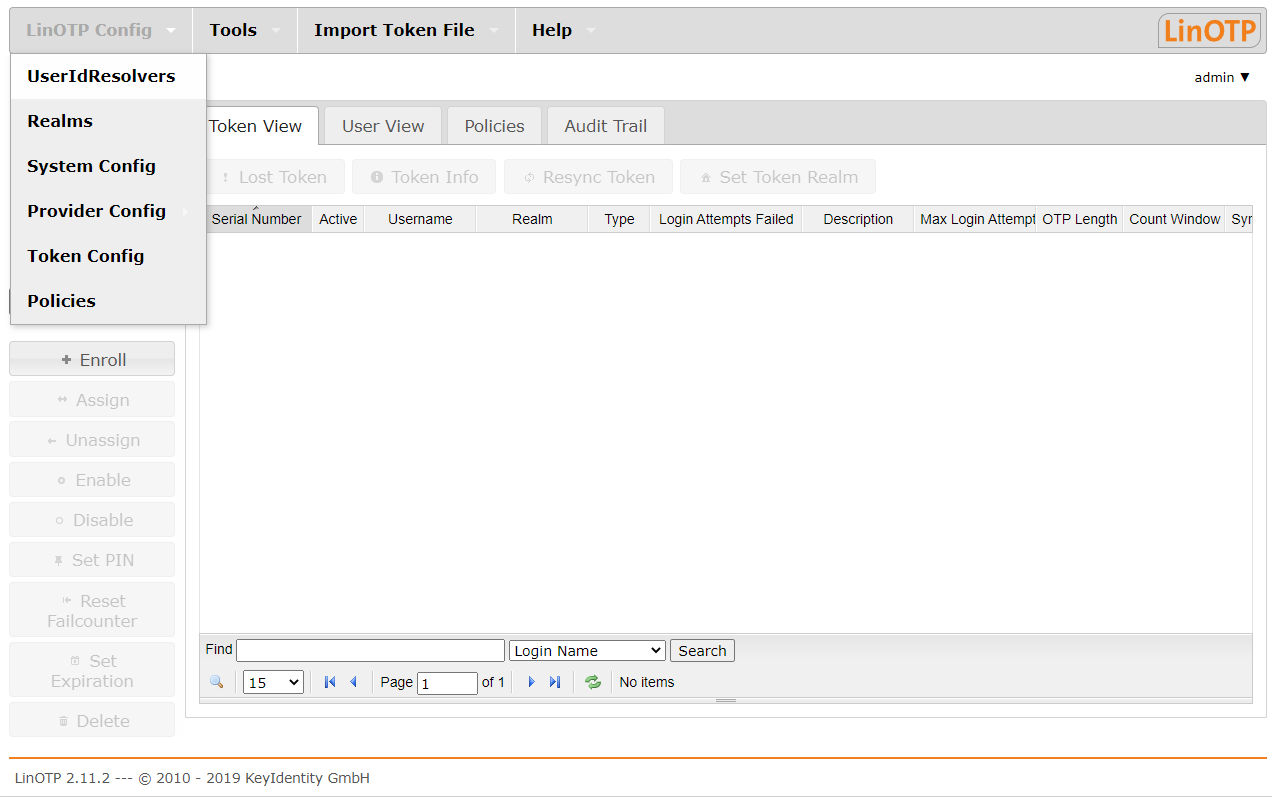
좌측 상단의 LinOTP Config > UserIdResolvers > +New > LDAP 선택

이름은 맘대로 정하고, Server-URI의 ldap:// 뒤에는 내 Directory의 DNS 주소 2개를 각각 적어준다
BaseDN : ou=users,ou=[your domain],dc=[your domain],dc=com
BindDN : cn=admin,ou=users,ou=[your domain],dc=[your domain],dc=com
Bind Password : Directory의 관리자(cn) 비밀번호
입력 다 하고 Test LDAP Server Connection을 눌러 연결이 잘 되는지 테스트해보자
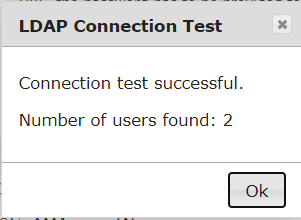
만약 연결이 실패한다면 보안그룹을 잘 열어줬는지와 비밀번호를 맞게 쳤는지를 확인해보자
그러고 Save > Close > OK 를 눌러주면 realm을 생성하는 창이 뜬다
+New 를 누른 후 Realm 이름을 정하고 resolver를 선택해준 후 Save를 눌러주자

그 다음엔 Policy 탭의 Import policies를 눌러 아래 파일을 넣어주자
Policy가 4개가 생겼다!
3. 사용자 MFA 등록
이번엔 https://[RADIUS 서버 IP]/ 로 접속해보자
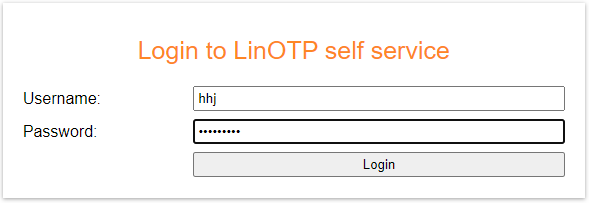
Directory의 User로 로그인할 수 있다 (WorkSpace 로그인 정보)

Google Authenticator compliant 를 체크해준 후, enroll TOTP token 을 눌러 토큰을 발급받자
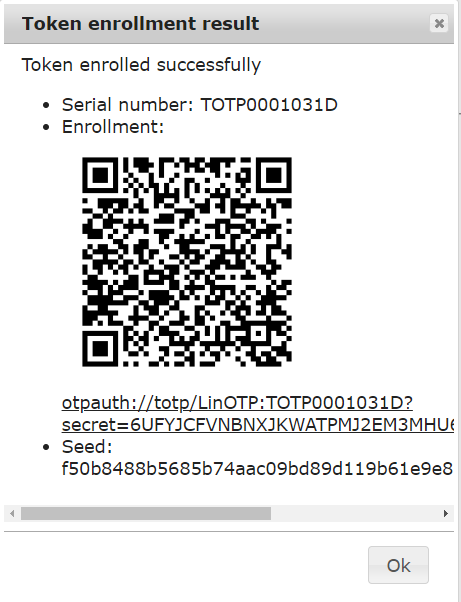
authenticator를 사용해 QR코드 스캔 후 MFA 등록하면 끝이다
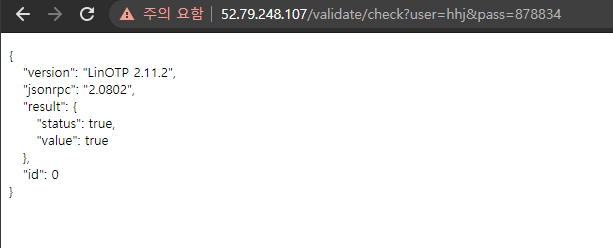
아래 링크로 접속해 잘 적용되었는지 Test해볼 수 있다
https://[RADIUS 서버 IP]/validate/check?user=[USERNAME]&pass=[PINOTP]
4. FreeRADIUS 설치 & 구성
FreeRADIUS 설치
yum install -y freeradius freeradius-perl freeradius-utils perl-App-cpanminus perl-LWP-Protocol-https perl-Try-Tiny git
cpanm Config::File
mv /etc/raddb/clients.conf /etc/raddb/clients.conf.back
mv /etc/raddb/users /etc/raddb/users.back
vi /etc/raddb/clients.conf - client 구역별로 비밀번호 지정
client localhost {
        ipaddr = 127.0.0.1
        netmask= 32
        secret = '비밀번호'
}
client directory {
        ipaddr = 10.0.0.0
        netmask = 16
        secret = '비밀번호'
}
FreeRADIUS용 LinOTP Perl 모듈 다운
git clone https://github.com/LinOTP/linotp-auth-freeradius-perl.git /usr/share/linotp/linotp-auth-freeradius-perl
vi /etc/raddb/mods-available/perl
# FreeRADIUS가 'linotp'플러그인을 실행하도록 허용

perl {
	filename = /usr/share/linotp/linotp-auth-freeradius-perl/radius_linotp.pm
}

Perl 모듈 활성화
ln -s /etc/raddb/mods-available/perl /etc/raddb/mods-enabled/perl
vi /etc/linotp2/rlm_perl.ini
#IP of the linotp server
URL=https://localhost/validate/simplecheck
#optional: limits search for user to this realm
REALM=honglab-realm # LinOTP 콘솔에서 만든 Realm 이름
#optional: only use this UserIdResolver
#RESCONF=flat_file
#optional: comment out if everything seems to work fine
Debug=True
#optional: use this, if you have selfsigned certificates, otherwise comment out
SSL_CHECK=False
REALM 부분만 내 Realm 이름으로 수정
활성화 된 구간에 대한 기본 링크 제거
rm /etc/raddb/sites-enabled/{inner-tunnel,default}
rm /etc/raddb/mods-enabled/eap
vi /etc/raddb/sites-available/linotp
# FreeRADIUS에서 LinOTP 활성화

server default {
        listen {
                type = auth
                ipaddr = *
                port = 0
                limit {
                        max_connections = 16
                        lifetime = 0
                        idle_timeout = 30
                }
        }
        listen {
                ipaddr = *
                port = 0
                type = acct
        }
        authorize {
                preprocess
                IPASS
                suffix
                ntdomain
                files
                expiration
                logintime
                update control {
                        Auth-Type := Perl
                }
                pap
        }
        authenticate {
                Auth-Type Perl {
                        perl
                }
        }
        preacct {
                preprocess
                acct_unique
                suffix
                files
        }
        accounting {
                detail
                unix
                -sql
                exec
                attr_filter.accounting_response
        }
        session {
        }
        post-auth {
                update {
                        &reply: += &session-state:
                }
        -sql
        exec
        remove_reply_message_if_eap
        }
}
소프트링크 활성화 & RADIUS 서비스 활성화
ln -s /etc/raddb/sites-available/linotp /etc/raddb/sites-enabled/linotp

systemctl enable radiusd
systemctl start radiusd
솔루션 테스트
radtest USERNAME MFACODE PRIVATERADIUSIP:1812 10 비밀번호
radtest hhj 439473 localhost:1812 10 [비밀번호]

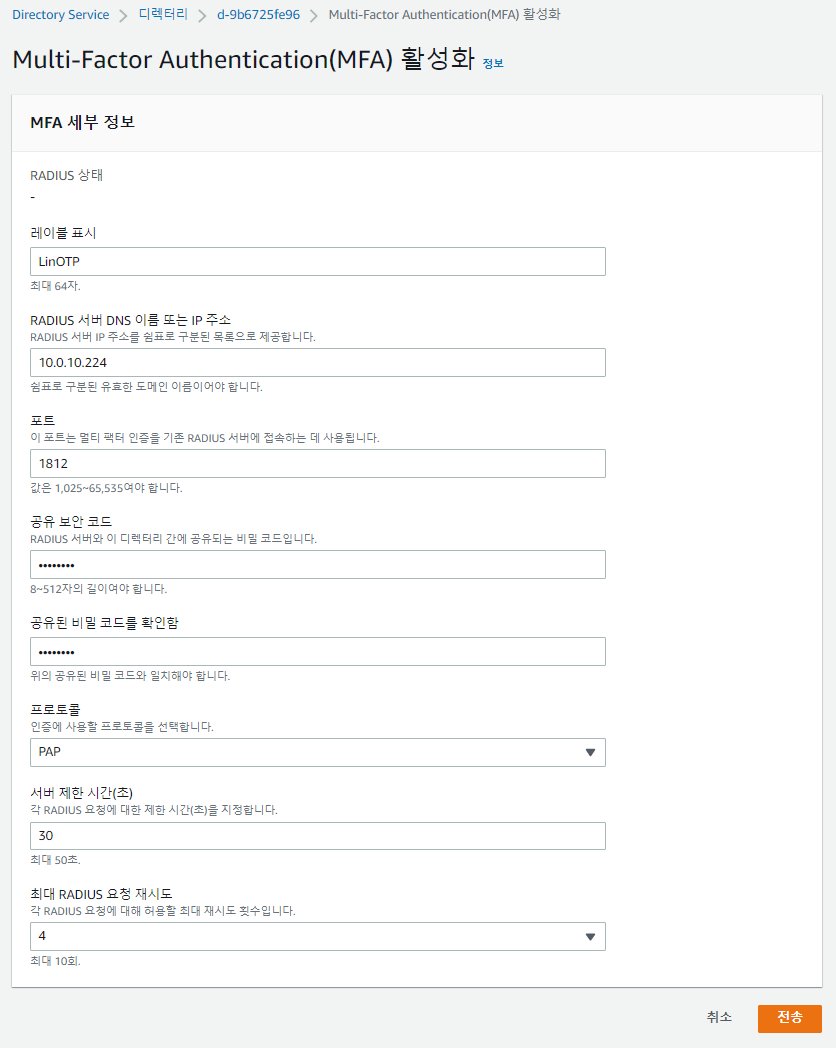
5. Directory에서 MFA 활성화
AWS Console > Directory Service > MFA 설정할 디렉터리 > 맨 밑의 멀티 팩터 인증 활성화

필요한 정보를 입력한다 - 공유 보안 코드는 위의 clients.conf 파일에서 지정한 비밀번호 입력
좀만 기다리면

WorkSpace에 접속해보면

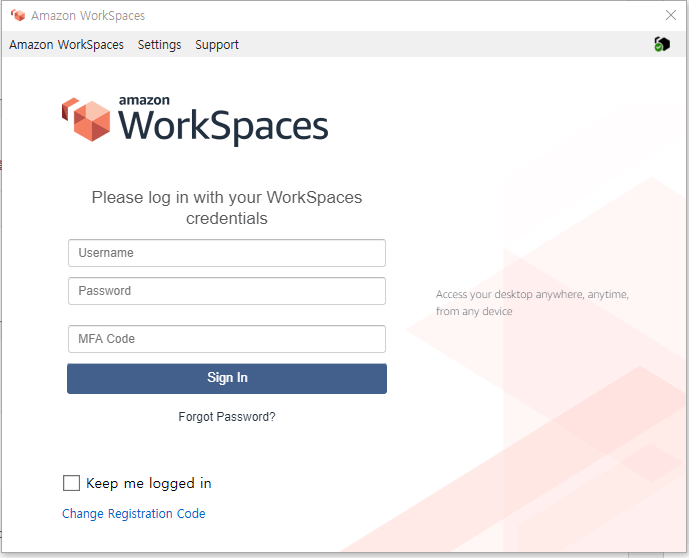
로그인 창에 MFA Code를 입력하는 칸이 나타났다
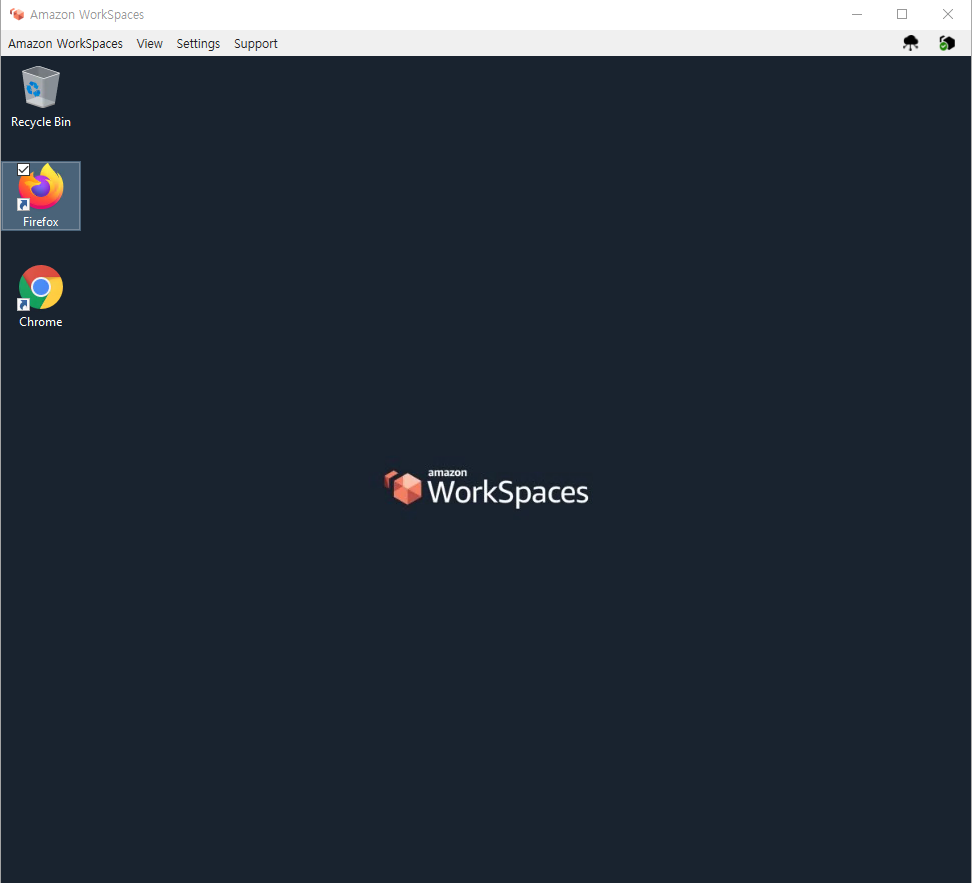
MFA Code까지 입력하고 나니 WorkSpaces에 접속도 잘 된다
끝!
'공부 > Linux' 카테고리의 다른 글
| [Linux] cgroup, cpu (3) | 2024.11.04 |
|---|---|
| [Linux] Squid로 HTTP Proxy 구성해서 Outbound Domain 제어하기 (0) | 2021.08.28 |
| [Linux] crontab 기초 & 스크립트 작성 팁 (0) | 2021.04.29 |
| [Linux] SSH 포트 변경하기 (0) | 2021.03.14 |
| [Linux] SWAP 메모리 설정 (0) | 2021.02.16 |



댓글